Easy to use – To be pre-mixed with cement and then mix with water.
Compatible with both gray & white cement.
Economical solution for tile fixing with less cement slurry consumption.
Good adjustability time with high water retention even at elevated temperature.
Greatly increases pot life, open time & workability ensuring higher speed of tiling with very less wastage.
No hollow sound behind tile due to high spreadability & coverage.
Improves adhesion & bond strength with self-curing property.
Low VOC – For healthy living.
Application Instruction
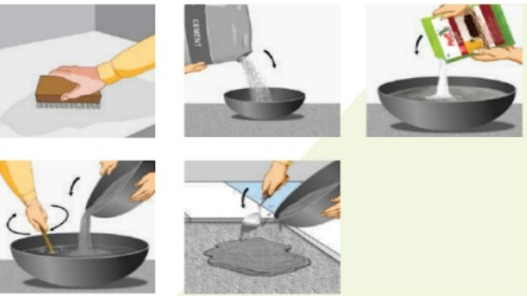
The substrate must be cured, undamaged, compact, rigid, resistant, dry and free from any debonding agents and from damp rising.
New concrete slabs shall be damp cured and 28 days old before application which will reduce the shrinkage from tile fixing surface.
Expansion joints to be provided & filled with suitable sealant.
Don’t cover expansion joints with thin set tile adhesive/ tile.
Ideally leveling bed / Machan should be prepared using Water: Cement : Sand : Water in the ratio of 0.4 : 1 : 6 (it can vary as per requirement).
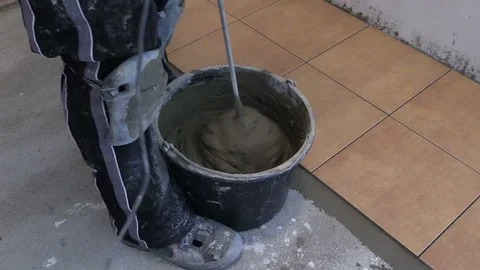
Mixing
Roff tile bonder to be mixed with cement / cement & sand.
For Cement- sand bedding (machan), mix 300 gms of RTB in 1 bag cement (50 Kg) and add this fortified pre-mix (mixer of cement & RTB) with sand in the ratio 1:6, or any other ratio as per industry best practices.
Add water to saturate the mix enough and bring to the desired levels and consistency. Water dosage can be decreased / increased depending upon cement and sand available at site to achieve the desired consistency for application.
For Tile or Stone laying over the Leveling Bed : Mix 300 gms of RTB in 1 bag cement (50 Kg) and add this fortified pre-mix (mixer of cement & RTB) with required water. Mix it thoroughly, to make a smooth, flowable, lump free slurry.
Allow the mix to stand for 2 minutes before using it.
Application of Tile Bonder
Apply either cement slurry or fortified RTB+ cement slurry over the base slab
While the coat is still wet, evenly spread the mortar/ machan over the area to be covered by cement bedding (machan). Compact the mortar well, while leveling the bed.
Proceed with tile laying using wet-on-wet method with RTB+ cement slurry.
Pour the mix described above, over fresh screed, and spread the slurry to a uniform thickness of 1 to 2 mm. Carefully place the tile onto a wet, sticky slurry.
Use spacers, to leave enough space between tiles. The joint width shall be as per the recommendation of architect / engineer.
Stroke the tiles using a rubber mallet, to level the tiles, and ensure the tile is perfectly embedded in the soft screed.
It is good practice to lift an occasional tile after fixing, to verify that the required contact is being achieved.
If the slurry is skinned over, remove the slurry and replace with fresh slurry.
If necessary, tiles should be adjusted within 5- 10 minutes of installation.
Carefully clean off any excess slurry from the tiles and joints with a damp sponge or cloth before it sets.
Leave for at least 72 hours before grouting. Remove the spacers before grouting
For highly absorbent natural stones which may form a wet patch when adhesive is used, it is recommended to use suitable Roff Impregnating sealer on all sides.
Coverage
Only 300 gm to be mixed with 50 Kg bags of cement & add this mixture in water.
Coverage will vary depending on thickness of leveling bed and the mix proportion used to make the leveling bed.
Slurry coverage would depend upon the porosity of the substrate.